Vacuum technology is both exciting and essential for silicon processing and many research disciplines. My idea was to start my vacuum journey by making a light bulb.
After some initial research, I decided that glass-to-metal seals are not a good project to start with glassblowing. So I got a tube to KF-25 adapter from Taobao and designed a small vacuum manifold.
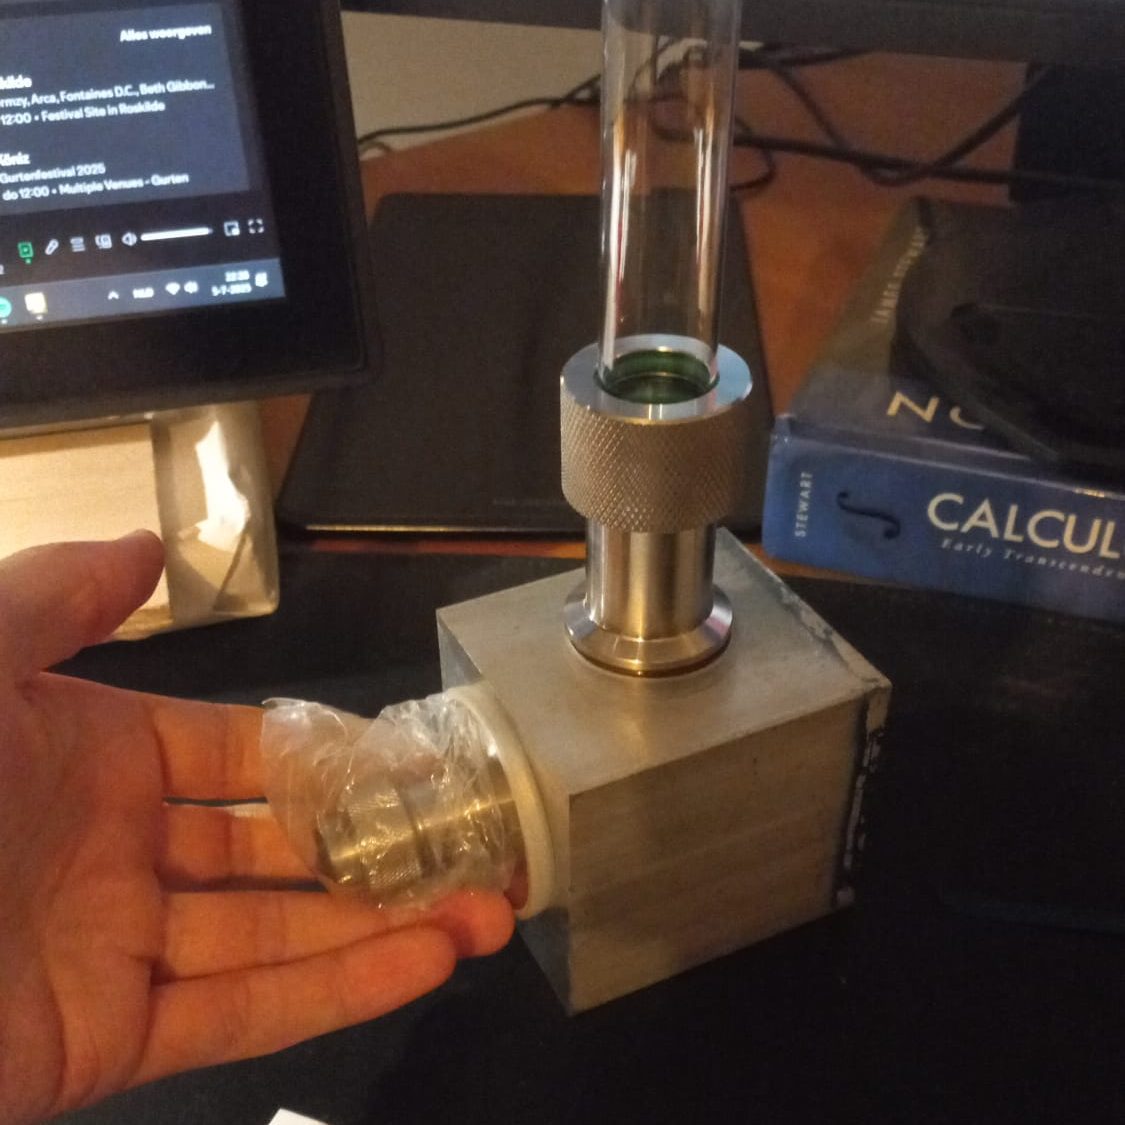
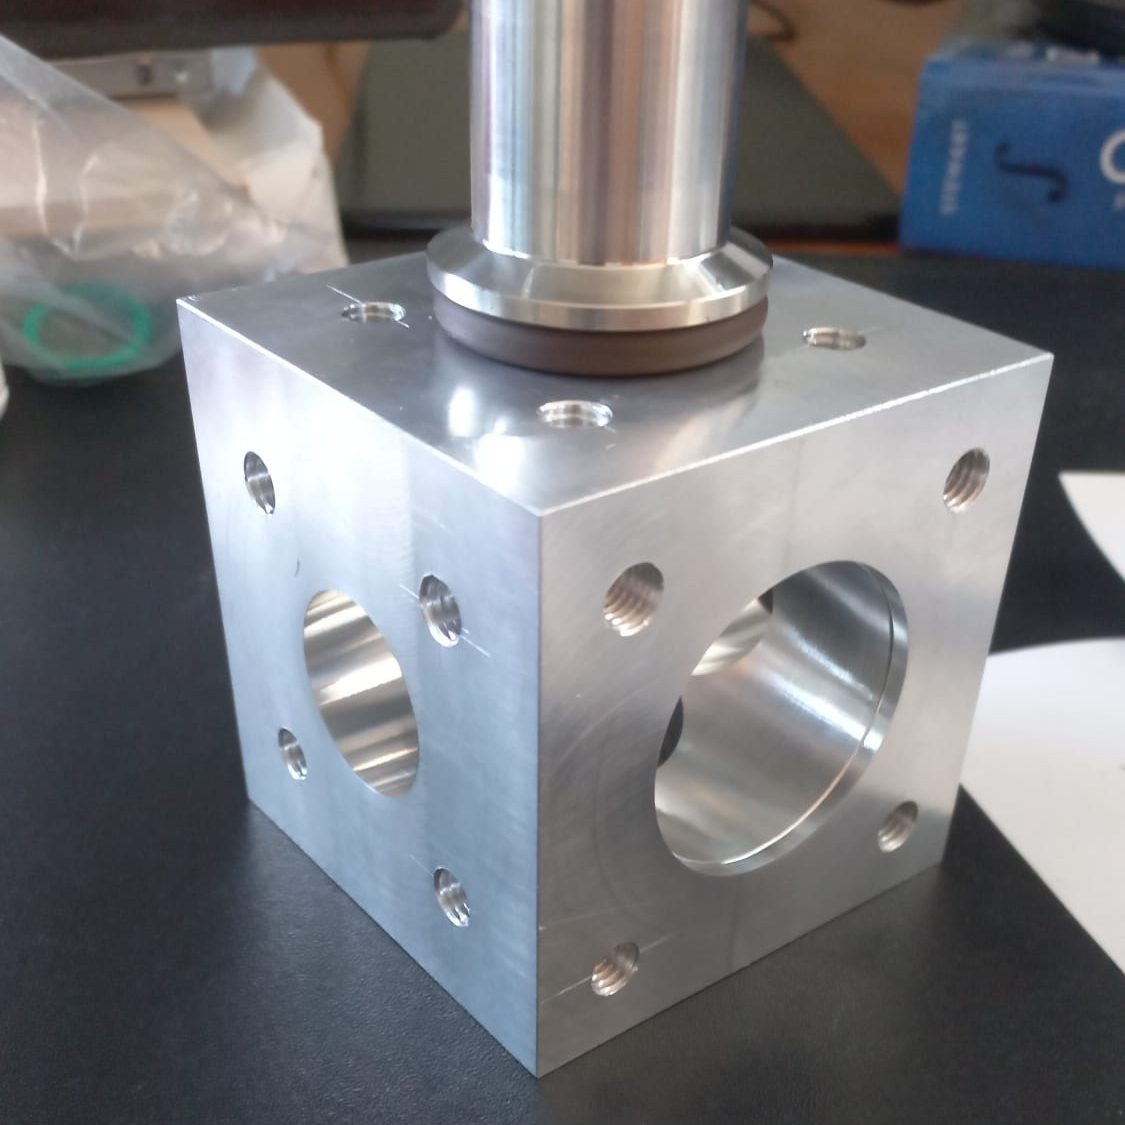
Aluminium vacuum manifold before and after milling. While working, I wasn’t paying close enough attention and accidentally made the threaded holes M8 instead of M6. As a result, standard clamps don’t fit.
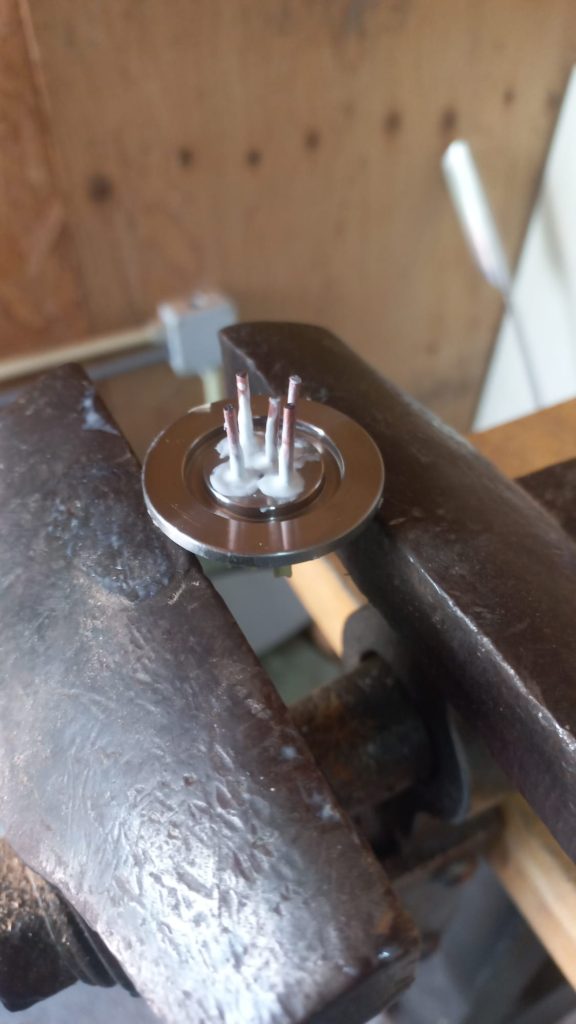
After that, I just needed an electric feedthrough and tungsten wire. The mess I made with the vacuum-compatible epoxy (Loctite Hysol 9492), and I would rather not do this again, especially considering the price of about 50 euro including delivery, for a small tube. The alternative, Faraday wax1, is a bit easier to work with and, in my opinion, more appropriate for hobby applications.
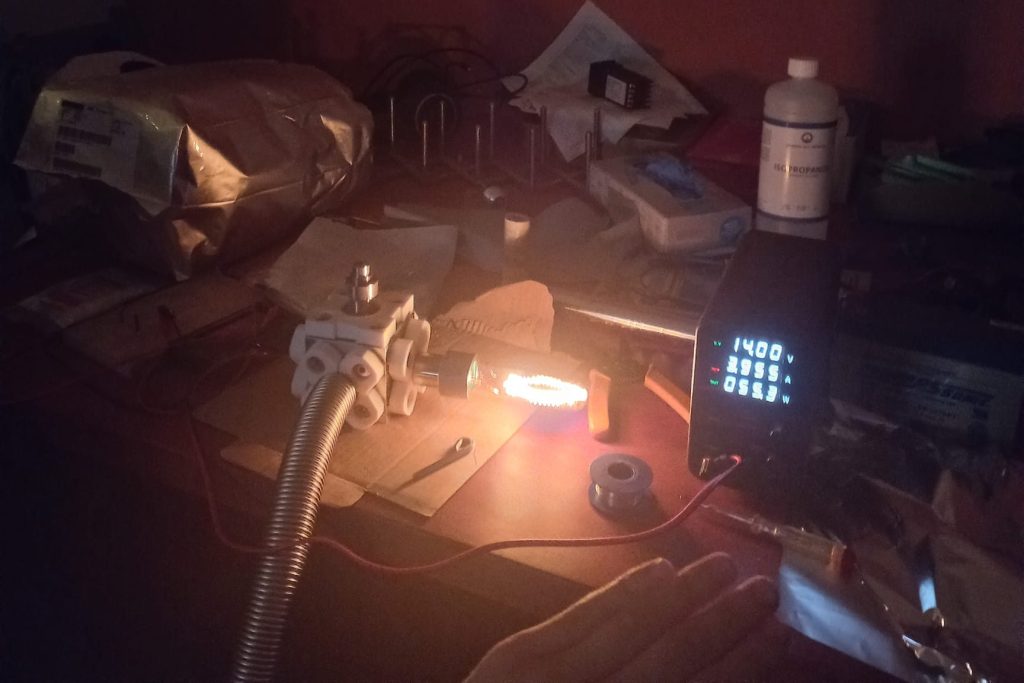
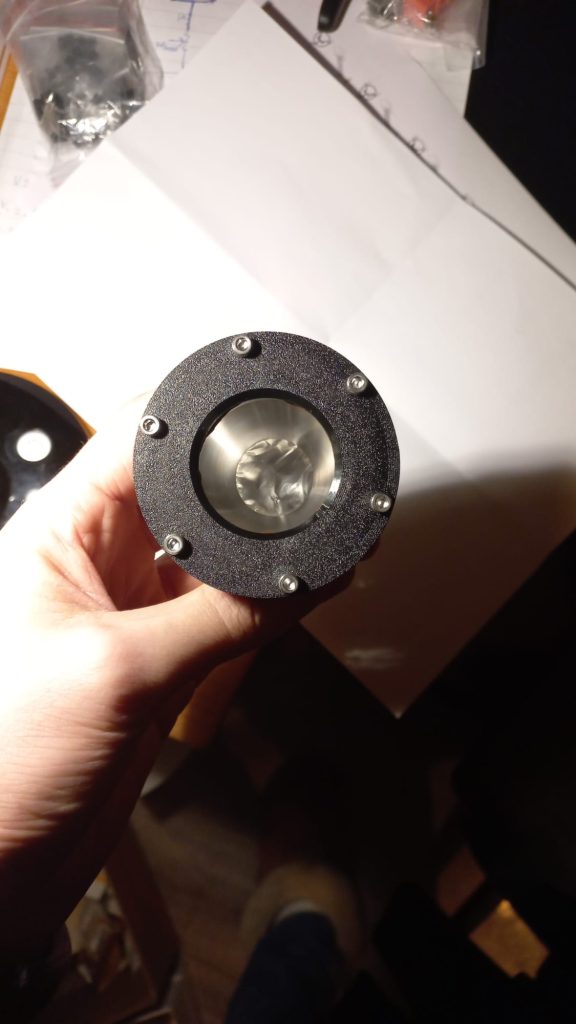
Glued vacuum feedthrough on the left and working lightbulb on the right
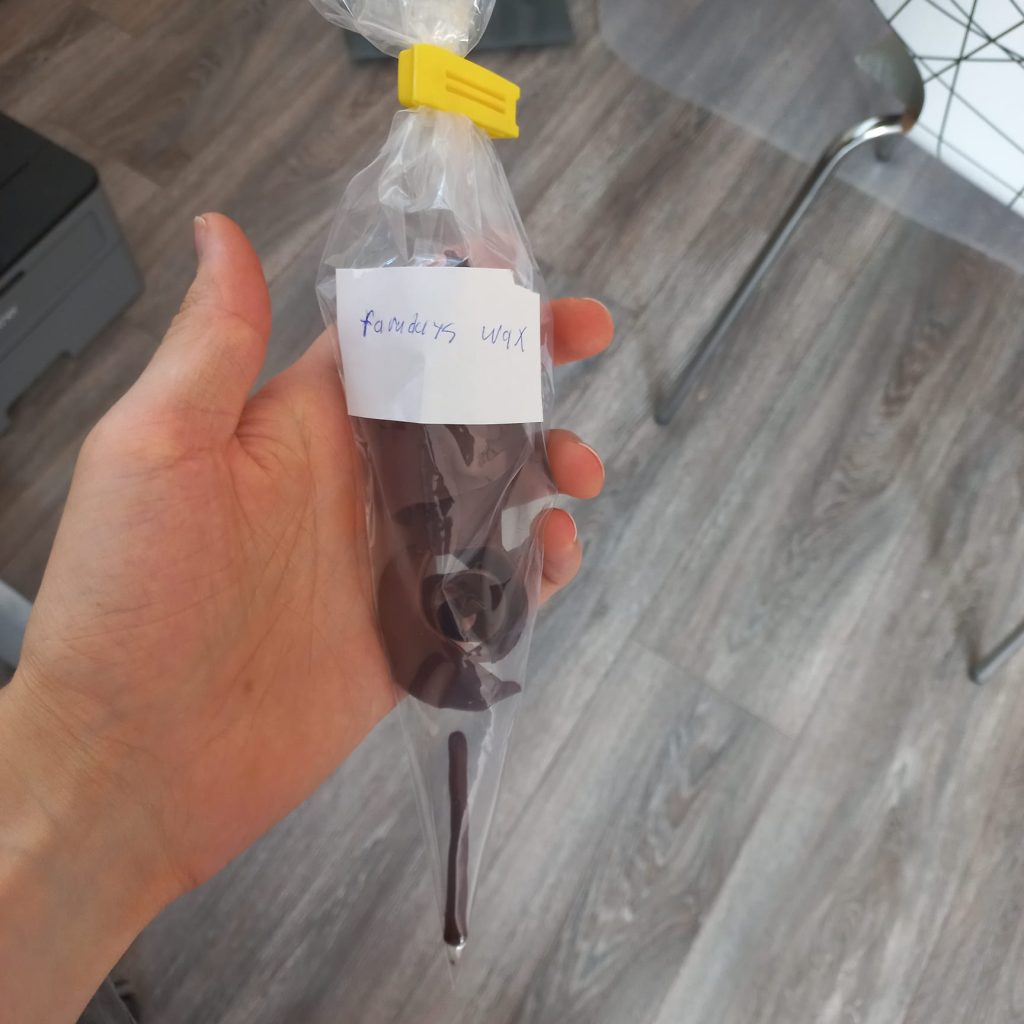
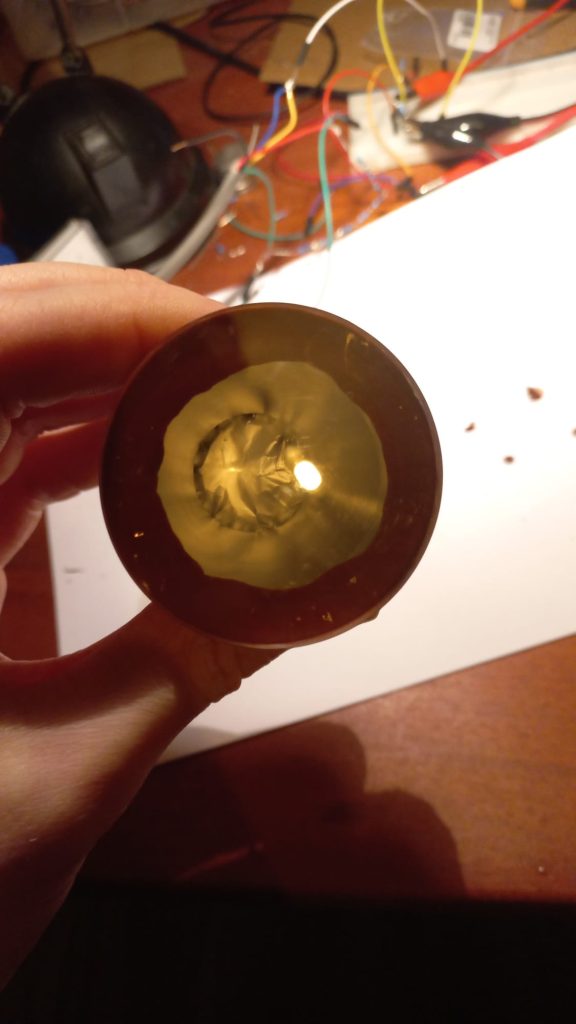
Fused silica window secured with Faraday wax.
Vacuum gauge
Vacuum gauges and controllers can be expensive for hobby use. There are some cheap options for Chinese vacuum gauges, but they come with limited documentation, and the controllers are still expensive.
As a first step, I decided to get a Pirani gauge because these operate at a safe voltage, are very affordable, and don’t require complicated electronics for readout.
The type I used is ZJ-52T Pirani gauge from Reborn. (about 20 euros on Taobao). Adding the electronics took a bit more effort than expected.
For those not familiar with Pirani gauges: A Pirani gauge measures the quality of a vacuum by measuring the heat loss from a hot wire to gas molecules striking it. The easiest way to operate this gauge is by applying a constant voltage to a Wheatstone bridge, where one resistor is the hot wire.2 The bridge voltage or current can then be measured and calibrated with a reference to measure the vacuum.
The ZJ-52T I bought had a filament resistance of 88 ohm and a temperature compensation resistor of 15 k ohm. With these values, I got a decent bridge voltage range of about 8 microA at 1000 – 10^-2 mBar for an applied 24V.
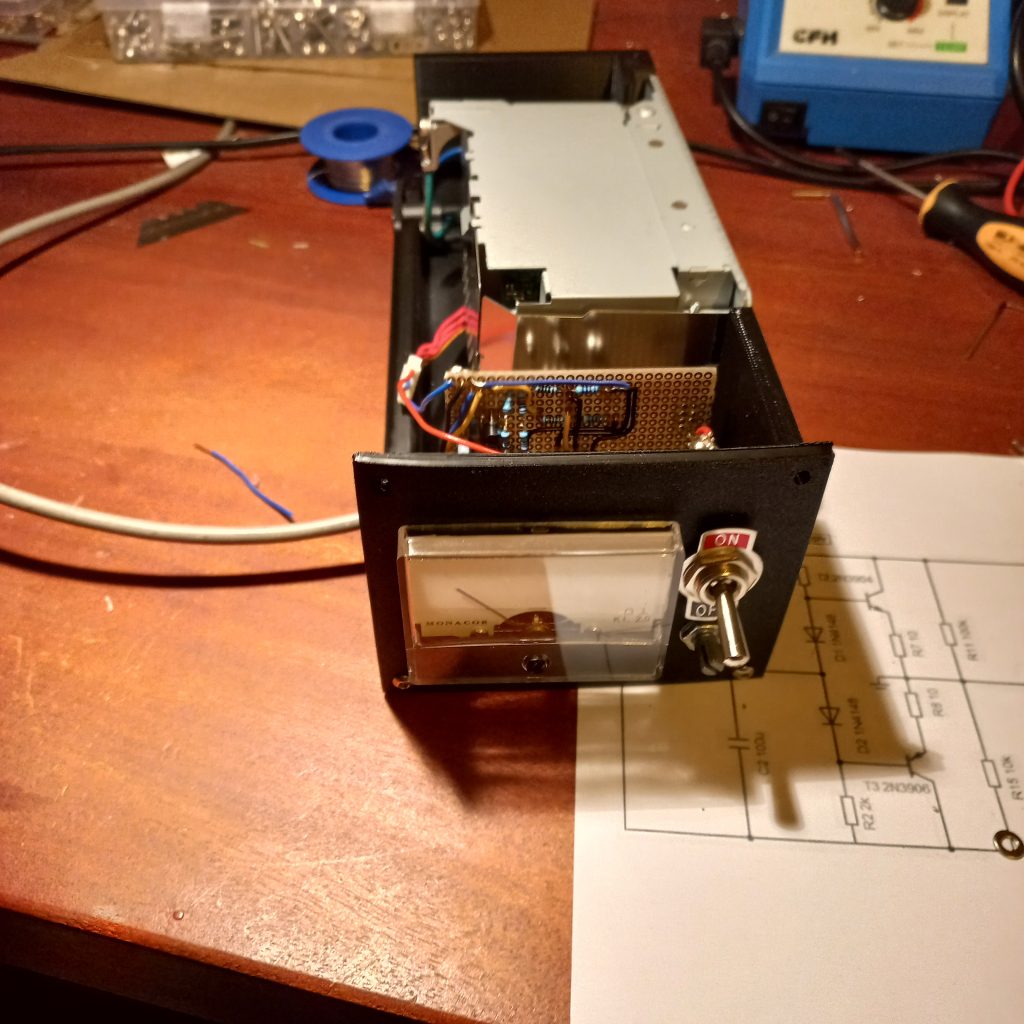
It became a bit more complicated when I decided to switch from using a multimeter to a more beautiful dedicated analog controller. I ordered a 2-30 micro A meter and expected that this would work as a replacement for the multimeter. This did not work, the analog micro A meter had a high impedance of 6.5 k ohm! Even at 30V, hardly any signal would pass.
Since I liked the analog look over a digital screen, I decided to amplify the signal so it would be sufficient for the micro A meter. I should have used an instrumentation amplifier for this purpose (but I didn’t know that when I started), so I used an opamp. Unfortunately, this opamp was not rail-to-rail. To overcome this issue, I used Sijosae’s design for a rail splitter, except that I made it asymmetric. For callibration I placed a potmeter after the micro A meter. If I made any electrical engineers in the room cry, I’m sorry.
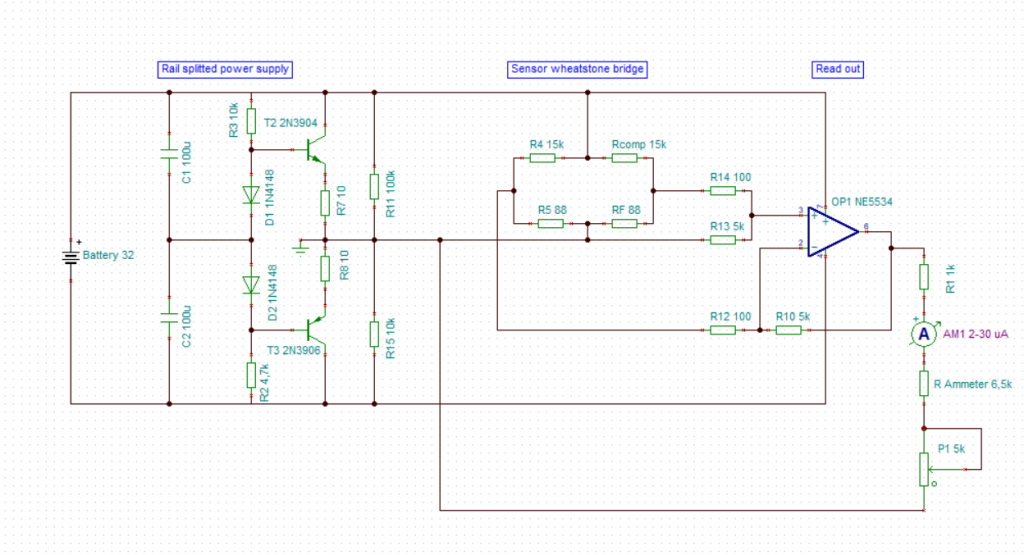
Electrical diagram for the ZJ52T controller (I believe I made some changes to the resistor values, but I have to check with a multimeter for the values). If you want to make something similar, please just use an instrumentation amplifier.
Designing the enclosure was fairly straightforward. My PETG filament was quite wet, and even a glue stick and brim couldn’t prevent serious warping problems with the print.

Vacuum gauge controller enclosure design.
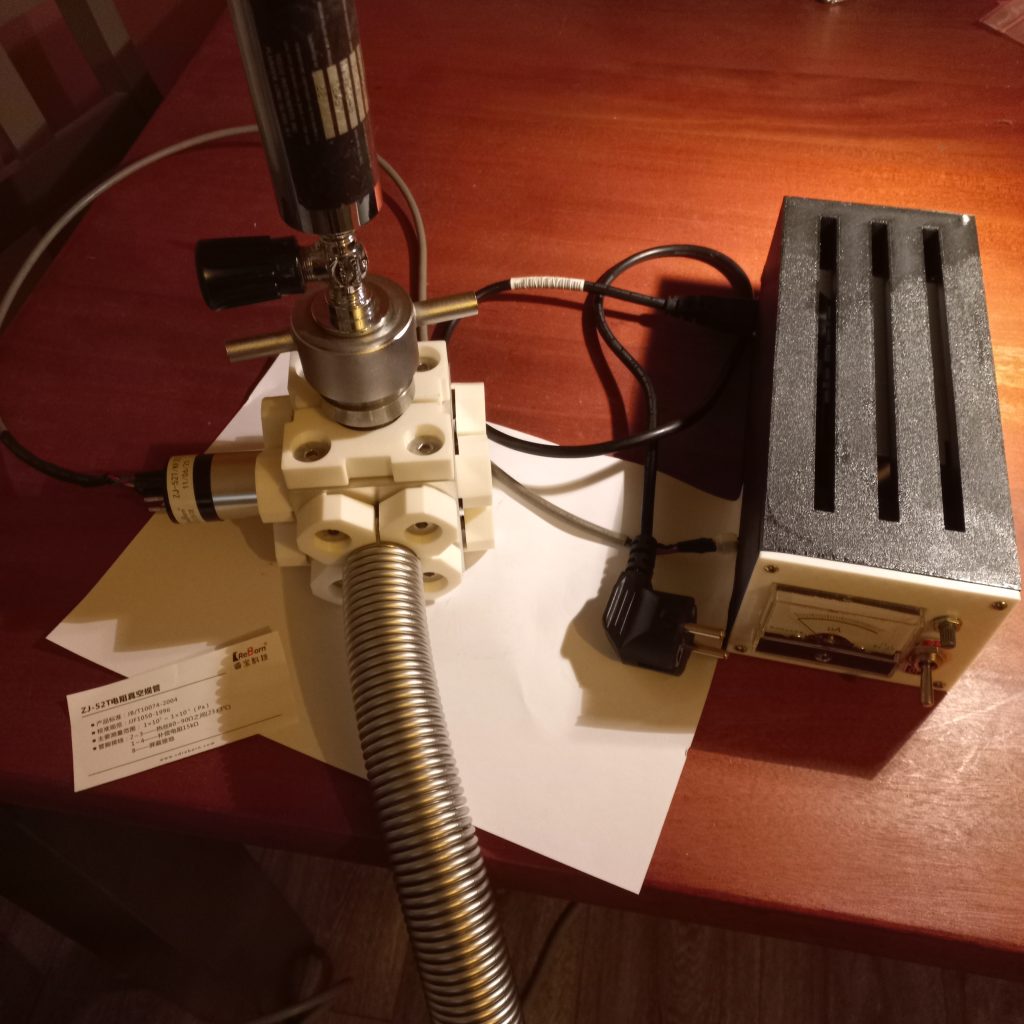
Vacuum gauge controller with top panel removed (left). DIY vacuum setup put together (right).
Now it’s time to address the elephant in the room: Calibration. I intend to borrow a properly calibrated vacuum gauge with a controller from my brother, who is also a vacuum enthusiast.
- https://en.wikipedia.org/wiki/Materials_for_use_in_vacuum ↩︎
- https://en.wikipedia.org/wiki/Pirani_gauge ↩︎
He leak detector
When I got this HLT 150 from an auction, I had no clue whether it would work and how to use it. Luckily, the kind people at Pfeiffer supplied me with a manual straight out of the archive from 1989!
After an oil change for the rotary vane pump and 3D printing a new case for the remote control, everything seems to work. Although calibration is still a point of concern, as the latest indication of the internal leak is from 2003.
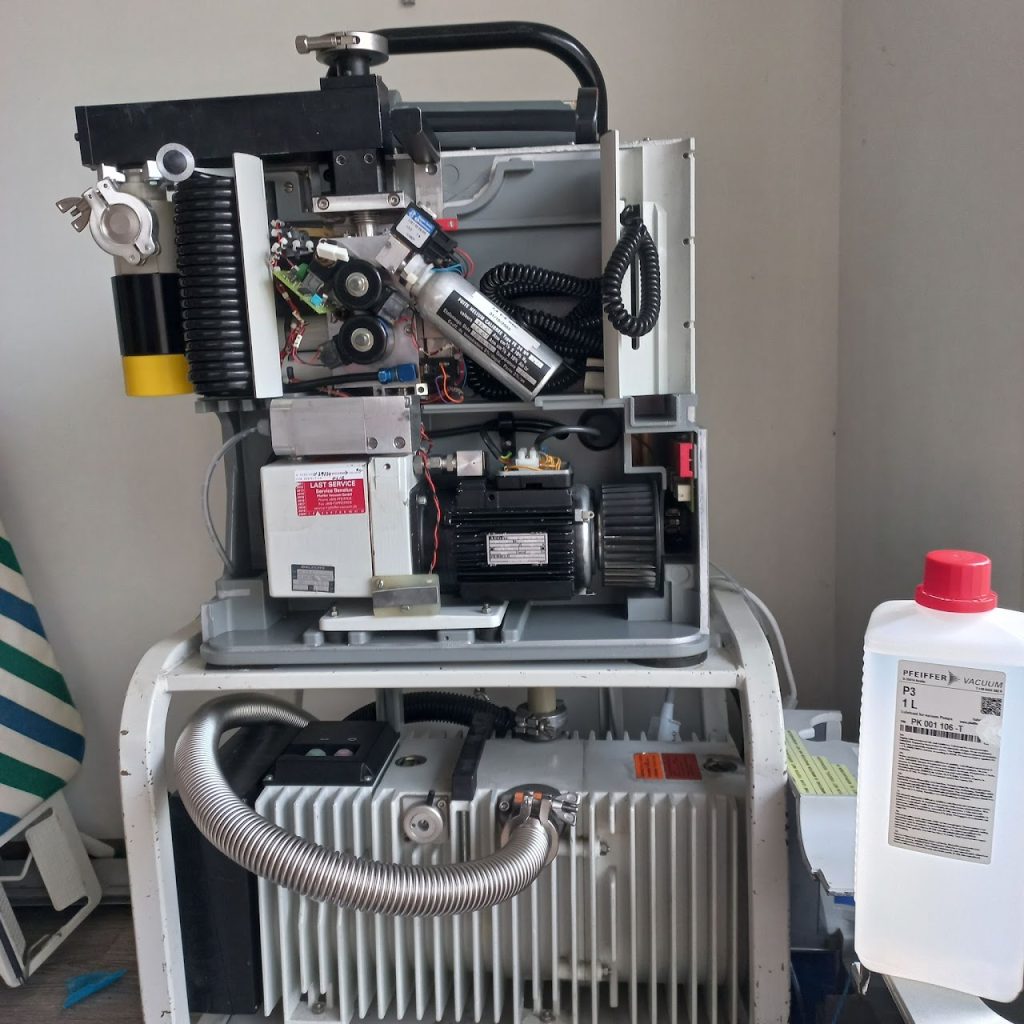
HLT 150 helium leuk detector.
Evaporator
With the basics out of the way, it’s time to build a high-vacuum system. A classical use case that builds on the lightbulb shown earlier is a thermal evaporator.
For this new vacuum toy, we need a turbo pump to reach a sufficient vacuum for a good deposition. Luckily, I could borrow a TMH 071 from my brother.
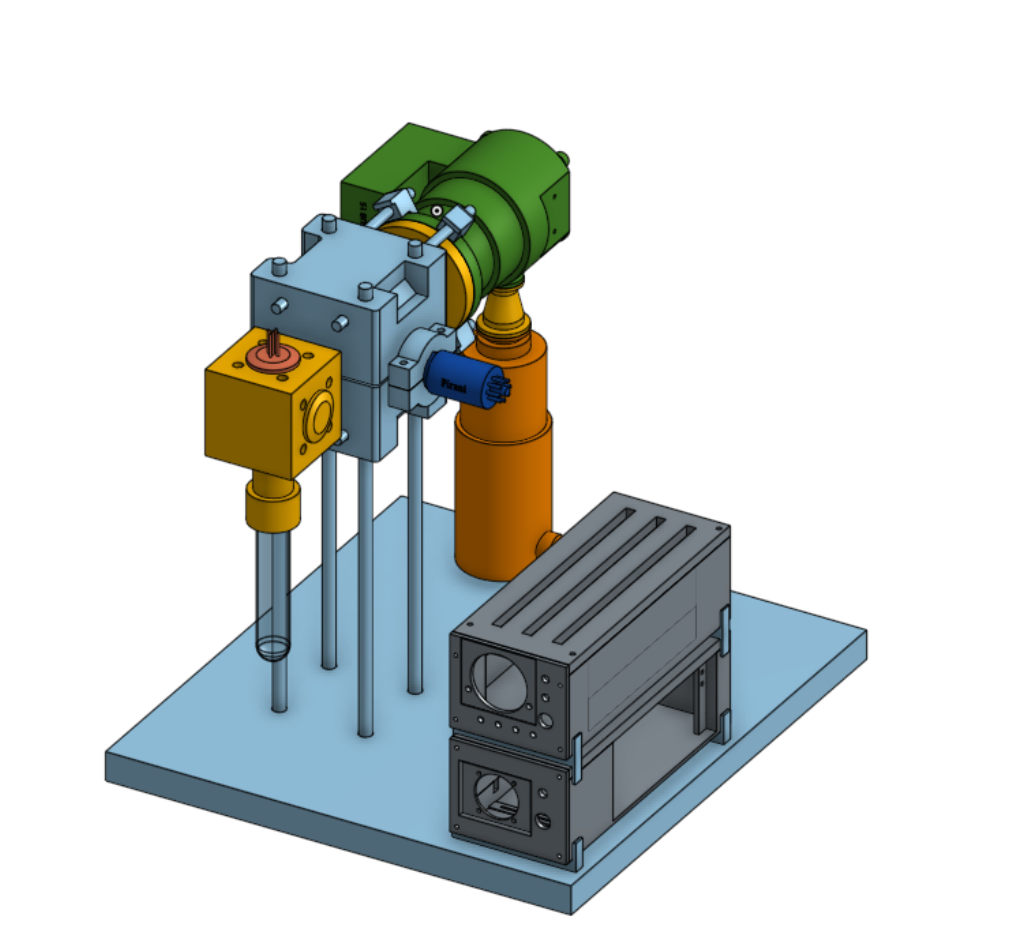
Test setup for thermal evaporation of metals. valve to roughing pump in orange, general vacuum parts in yellow, turbopump in green, frame in light blue, Pirani and turbo PSUs in grey.